
MSU Secure File Transfer Portal
What is the MSU Secure File Transfer Portal?
The MSU Secure File Transfer Portal is a Data Loss Prevention Tool, that can be used to send and receive files that require encryption and cannot be shared via email, SharePoint, or other electronic communication tools.
Note: FERPA compliant information IS allowed to be sent using this method
What kind of data can be sent through the Secure File Transfer Portal?
With the Secure File Transfer Portal, you can send/receive data classified as Restricted and Confidential. For more examples , check the Data Storage Guidelines matrix. Anything marked Yes in the Store in Knox column may be sent in a file through the SFTP.
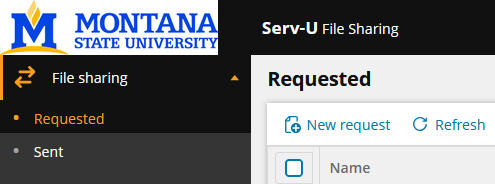
How do I get started?
Use the Portal Login button at the top of this page to sign in with your NetID. Follow the How-To's below to transfer files.
How-To's
1. Click the portal login button at the top of this page.
2. Log in to Solarwinds with your MSU NetID and password.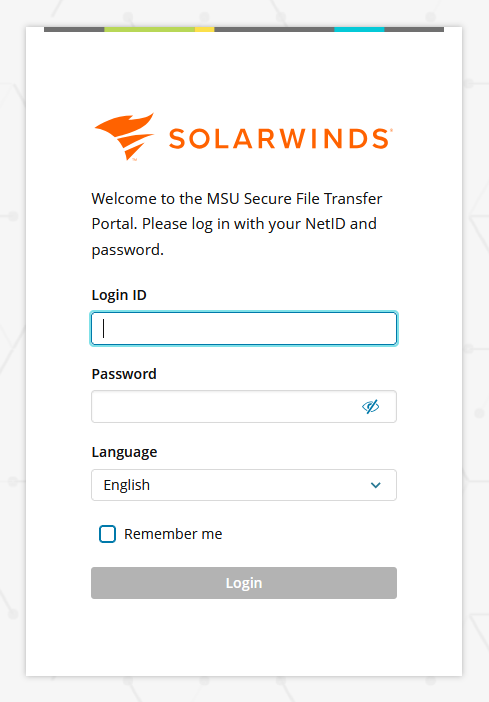
You will be taken to the main Secure File Transfer portal page.
3. While in the Request tab, click "New Request".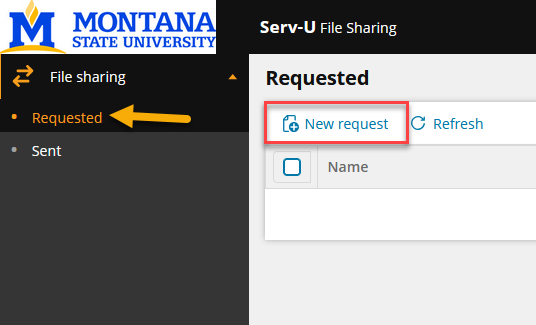
A pop-up will appear prompting you to fill out the request form.
4. Fill out the first page of the Request File form, then click Next.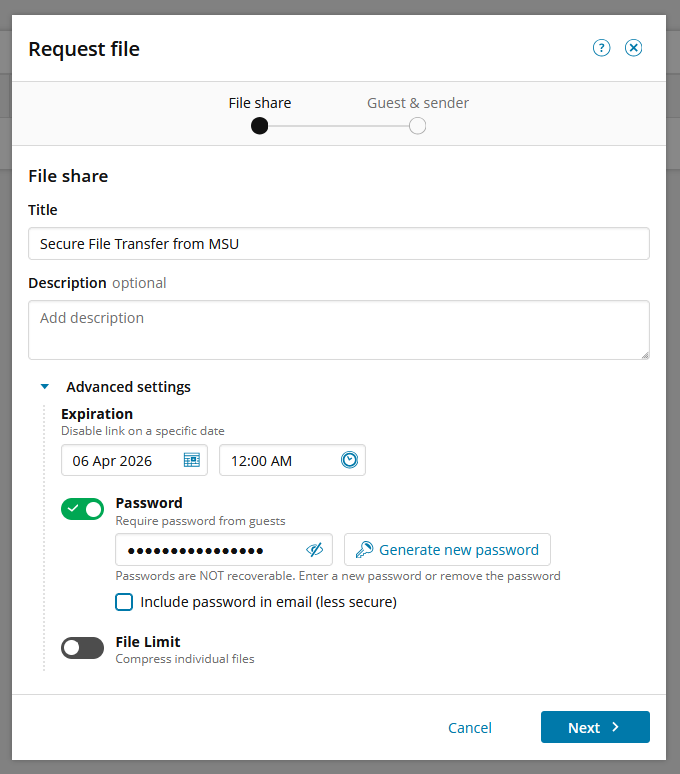
Under Description, provide the name of the file or the information needed to let the
recipient know what to upload.
5. Fill out the second page of the Request File form, then click Finish.
If you didn't supply a recipient, you will receive this notice to copy a link and
provide it manually: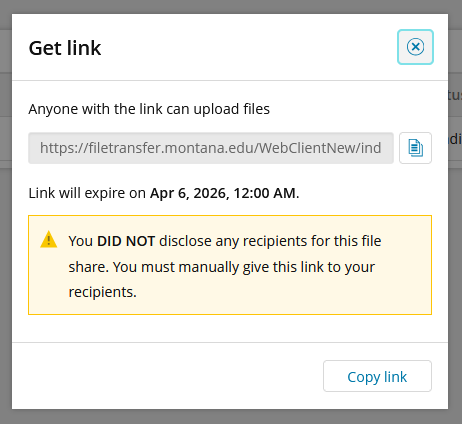
6. Under your requested files, you will now see a list of files you have sent.
The status of each request will change depending on whether or not the recipient has
sent the file(s) or not.
7. If you click on a request, you will be taken to its sub-page, which lists whatever
files the recipient provided.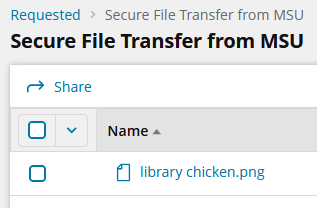
8. The recipient of the request will get an email notifying them of the request. For
example, this is what it would look like if the recipient used a Gmail account:
The contents of the email will look like this:![Screenshot of an email from servu@bsubillings.edu, on behalf of [enter NetID@msu.montana.edu account used to send the request] letting you know that you have "been granted access to a secure document share in MSU's Secure File Transfer Portal". Below this, text reads "To better protect the sensitive imformation of our students and employees, all documents in that share are encrypted and available only to you through the link below, which will expire [insert expiration date here]. Following this is more text advising the recipient that this is an automated message and any questions should be directed to the sender. The link to the portal request is listed below this. Under the link is a section for "Notes from sender", which the sender would have filled out when creating the request.](/uit/securefile/images/SFT%20-%20request%20file%20-%20transfer%20notice%20email.png)
9. If you selected the option to receive a notification when the recipient uploads
the requested file(s), you will receive an email in whatever email you provided. In
Outlook, this will look like this:![Screenshot of an Outlook inbox email preview. This email is from ServU Transfer with the subject "File uploaded to share: Secure File Transfer", with the sub-summary below this reading "[You don't often get email from servu@msubillings.edu]".](/uit/securefile/images/SFT%20-%20request%20file%20-%20email%20inbox%20notif.png)
It does not matter that the email references MSU Billings; it still corresponds to
MSU's Secure File Transfer Portal.
10. The email you receive will look like this:![Screenshot of an email from servu@bsubillings.edu letting you know that a file has been uploaded by the requested recipient. At the top of the message is text reading "[You don't always get email from servu@msubillings.edu. Learn why this is important at https://aka.ms/LearnAboutSenderIdentification]". Under this is more text reading "A file has been uploaded from share "Secure File Transfer from MSU" (this name will change depending on what you name the request). The email also lists the link to access the file and the same, size, and IP address of the file. At the bottom, there is a "Reply" button and a "Forward" button.](/uit/securefile/images/SFT%20-%20request%20file%20-%20email.png)
11. Once the file upload has been completed by the recipient, the requested will be listed with a status of "Received" under the Requests list in your portal.
Files exist in the portal for up to 7 days.
Uploading requested files
If you are the recipient of a file request, click on the link provided in the email you received from servu@msubillings.edu and it will take you to the Secure File Transfer Portal.
1. Input the password (if the request has one) and it will take you to the share.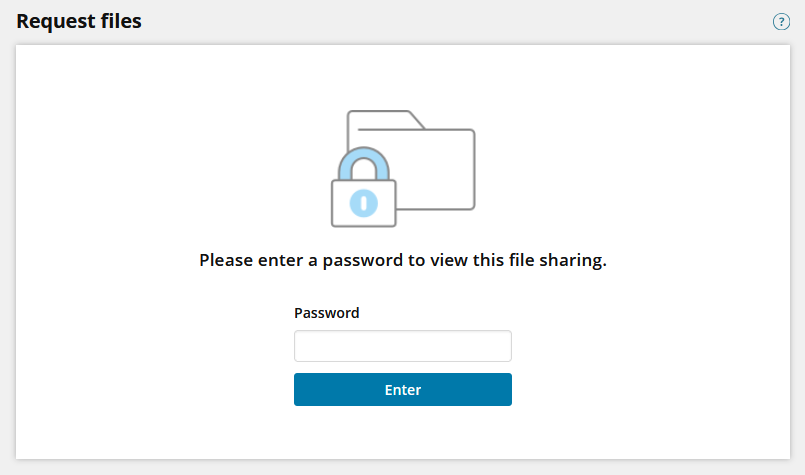
2. You will be taken to the file upload page. ![Screenshot of a simple white page with the title "Request files" in the upper left corner. Below the title is a list of the following information: Subject - Secure File Transfer from MSU. Comments - [empty]. Sender - NetID@msu.montana.edu (first.last@montana.edu). Expires - Apr 6, 2026, 12:00:00 AM. URL - [link to share]. There is an option to copy the link below it. At the bottom of the page is a section titled "Upload files". In the center of this section is light grey text reading "Drop files to upload, or browse", where the browse option is a link that takes you to your computer's file explorer. At the bottom left of the screen is small text reading "Maximum file size can be limited depending on browser used".](/uit/securefile/images/SFT%20-%20request%20file%20-%20upload%20file.png)
Once uploaded, you do not need to click any buttons, but you'll see the upload status
at the top right corner of the screen.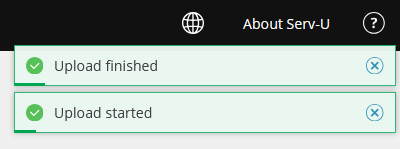
1. Click the portal login button at the top of this page.
2. Log in to Solarwinds with your MSU NetID and password.
You will be taken to the main Secure File Transfer portal page.
3. While in the Request tab, click "New Request".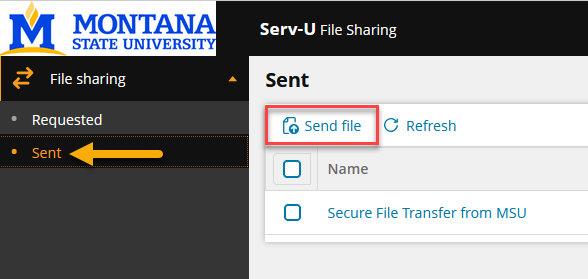
A pop-up will appear prompting you to fill out the request form.
4. Fill out the first page of the Request File form, then click Next.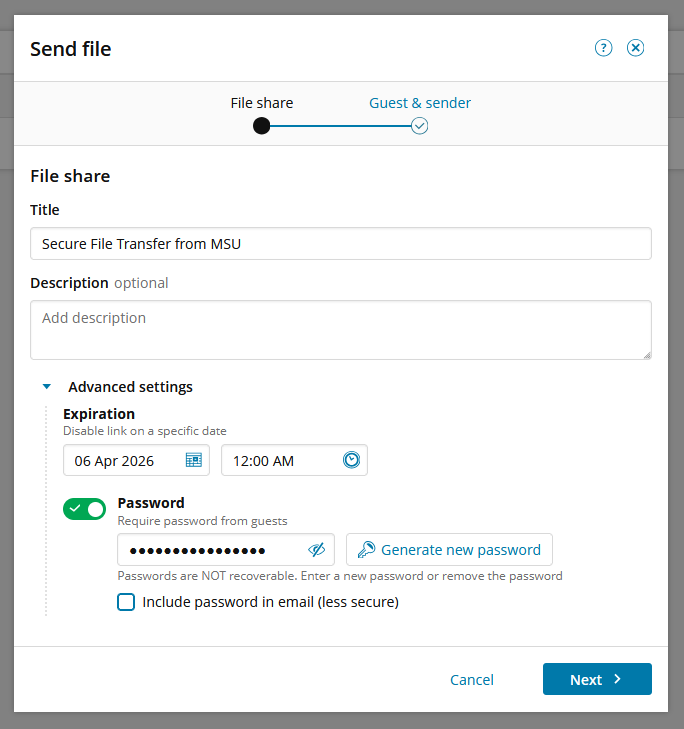
Under Description, provide the name of the file or the information needed to let the
recipient know what to upload.
5. Fill out the second page of the Request File form, then click Finish.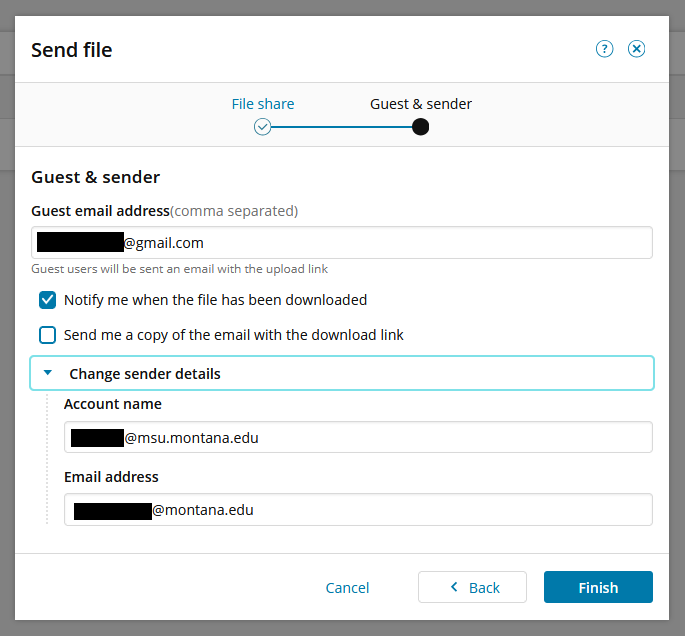
If you didn't supply a recipient, you will receive this notice to copy a link and
provide it manually:
6. Under your sent files, you will now see a list of individual instances. These instances
do not have files in them until you click into one and upload.
The status of each instance will change depending on whether or not the recipient
has downloaded the file(s) or not.
7. If you click on an instance, you will be taken to its sub-page, which lists whatever
files the sender provided.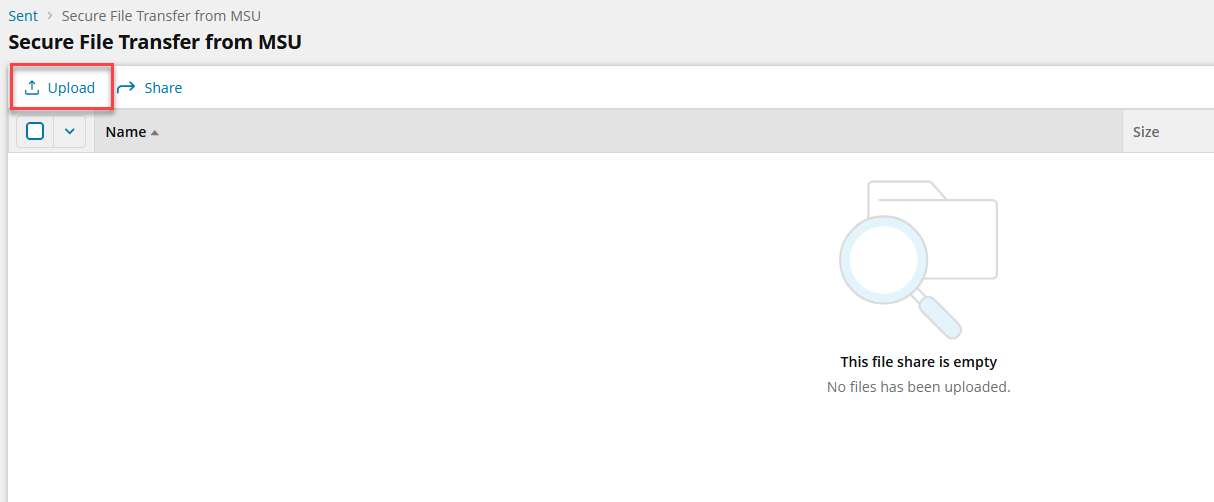
8. Select "Upload" to begin the upload process. A pop-up will appear prompting you
to browse for and choose a file or files to upload, then select Done.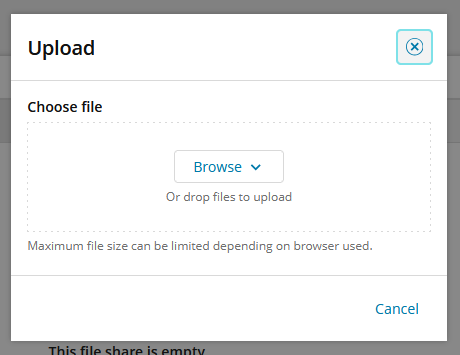
9. The sent file(s) will now appear in the instance's list.
10. The recipient of the file(s) will get an email notifying them of the request.
For example, this is what it would look like if the recipient used a Gmail account:
The contents of the email will look like this:![Screenshot of an email from servu@bsubillings.edu, on behalf of [enter NetID@msu.montana.edu account used to send the request] letting you know that you have "been granted access to a secure document share in MSU's Secure File Transfer Portal". Below this, text reads "To better protect the sensitive imformation of our students and employees, all documents in that share are encrypted and available only to you through the link below, which will expire [insert expiration date here]. Following this is more text advising the recipient that this is an automated message and any questions should be directed to the sender. The link to the portal request is listed below this. Under the link is a section for "Notes from sender", which the sender would have filled out when creating the share.](/uit/securefile/images/SFT%20-%20send%20file%20-%20transfer%20notif%20email.png)
11. If you selected the option to receive a notification when the recipient downloads
the sent file(s), you will receive an email in whatever email you provided. In Outlook,
this will look like this:![Screenshot of an Outlook inbox email preview. This email is from ServU Transfer with the subject "File downloaded from share: Secure File Transfer", with the sub-summary below this reading "[You don't often get email from servu@msubillings.edu]".](/uit/securefile/images/SFT%20-%20send%20file%20-%20email%20inbox%20notif.png)
It does not matter that the email references MSU Billings; it still corresponds to
MSU's Secure File Transfer Portal.
12. The email you receive will look like this:![Screenshot of an email from servu@bsubillings.edu letting you know that a file has been downloaded by the requested recipient. At the top of the message is text reading "[You don't always get email from servu@msubillings.edu. Learn why this is important at https://aka.ms/LearnAboutSenderIdentification]". Under this is more text reading "A file has been downloaded from share "Secure File Transfer from MSU" (this name will change depending on what you name the instance). The email also lists the link to access the file, and the name and IP address of the file. At the bottom, there is a "Reply" button and a "Forward" button.](/uit/securefile/images/SFT%20-%20send%20file%20-%20email.png)
11. Once the file download has been completed by the recipient, the instance will be listed with a status of "Downloaded" under the Sent list in your portal.
Files exist in the portal for up to 7 days.
Downloading sent files
If you are the recipient of a file share, click on the link provided in the email you received from servu@msubillings.edu and it will take you to the Secure File Transfer Portal.
1. Input the password (if the instance has one) and it will take you to the share.
2. You will be taken to the file download page. ![Screenshot of a simple white page with the title "Send files" in the upper left corner. Below the title is a list of the following information: Subject - Secure File Transfer from MSU. Comments - [empty]. Sender - NetID@msu.montana.edu (first.last@montana.edu). Expires - Apr 6, 2026, 12:00:00 AM. Password protected - yes. URL - [link to share]. There is an option to copy the link below it. At the bottom of the page is a section titled "Download files". In this section, a single file is listed titled "library chicken.png" with a check box on its left and a file size of 471.69 KB at the far right. At the bottom right of the screen are two buttons: one white with blue text reading "Download all", the other one blue with white text reading "Download".](/uit/securefile/images/SFT%20-%20send%20file%20-%20download%20screen.png)
Your files will download to your device.
