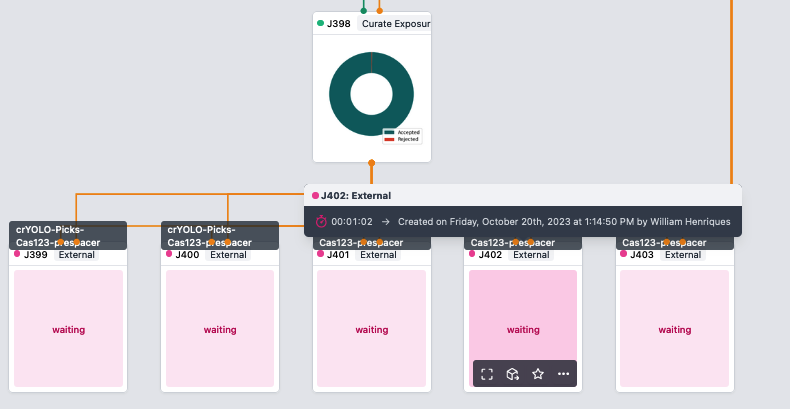
cryoEM-cryolo
This tutorial is for using cryolo in combination with cryoSPARC for particle picking.
This tutorial has been adapted from Colin Gauvin's post on the cryoSPARC forum
Preparing training set
- Prepare a training set of 5-10 micrographs from a particle stack that gave you a reasonable
reconstruction that you will use to train cryolo (this maybe be from either blob picker
or template picker at this point).
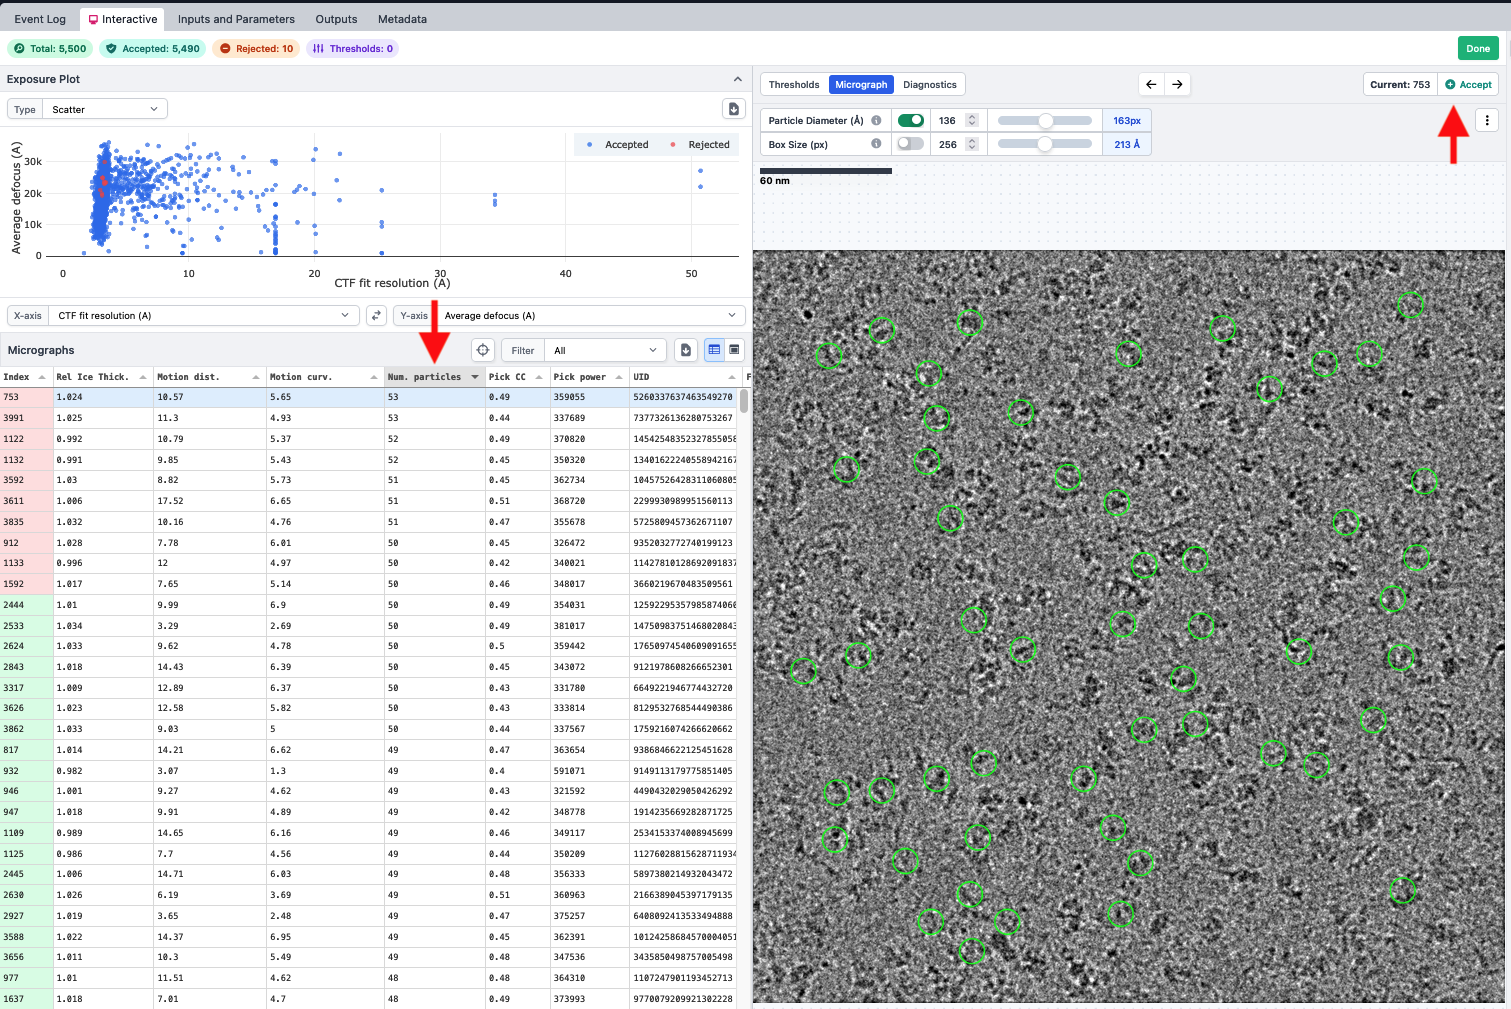
- Connect the particles associated with your best reconstruction and your micrographs to a "Curate Exposures job"
- Sort by the number of particles, pick your preferred micrographas, and reject them using the button in the top right
- Once you have 5-10 exposures rejected, click done. Take note of job and project number.
- Split your exposures into either groups (if collected with multishot matrix strategy (e.g. 5x5 or 3x3) or exposure sets
-
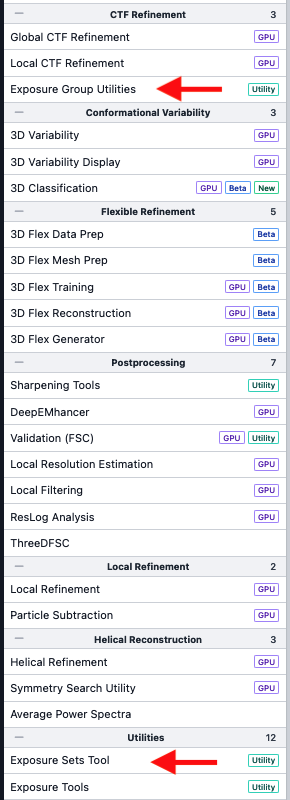
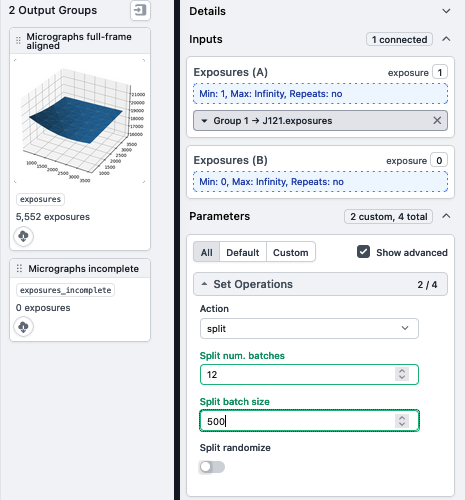
- If you have collected data without a multishot matrix, use the "Exposure Sets Tool"
under "Utilities" in the right sidebar
- Note: in this example, a dataset of 552 exposures is being split into 12 batches of 500 micrgoraphs. The final group will only have 2 micrographs.
- If you have collected data without a multishot matrix, use the "Exposure Sets Tool"
under "Utilities" in the right sidebar
- If you have collected data using a 3x3 or 5x5 multishot strategy, subset your exposures
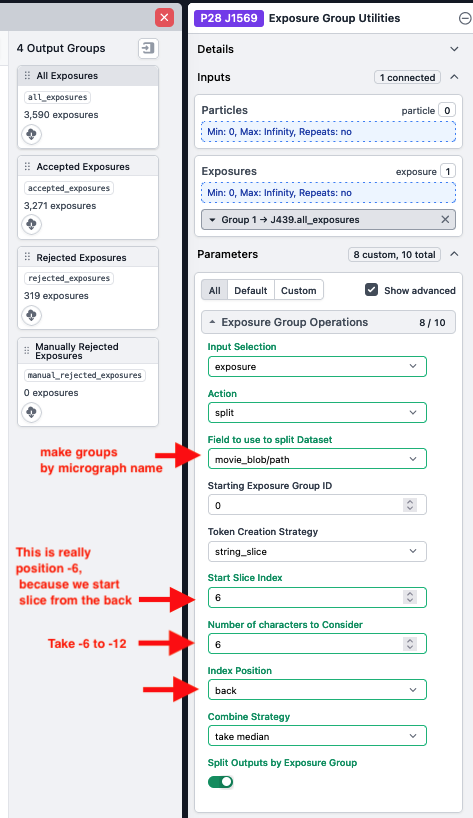
using "Exposure Group Utilities" under "CTF Refinement" in the right sidebar
- Note: Exposure groups by multishot collected MSU have a standard format, where multishot position is recorded as the last element of the micrograph name, <micrograph_name>X<+/->nY<+/->m-0.tif (e.g. dilute-Cas123_02436_X+0Y+2-0.tif).
- As a result, exposures can be grouped by multishot position using a slice of the micrograph name that contains the X,Y coordinates of the multishot position
- In this example, the multishot position can be obtained by slicing out the -12 to -6 positions in the micrograph name
- If you have collected data using a 3x3 or 5x5 multishot strategy, subset your exposures
using "Exposure Group Utilities" under "CTF Refinement" in the right sidebar
Preparing cryolo scripts
- Log onto Tempest and make a directory called cryolo.
-
mkdir cryolo
-
- In your cryolo directory, copy the script cryolo.py from the bottom of Colin's tutorial and rename it something informative (e.g. cryolo_PXX_JXX where XX is replaced by
project number and job number of refinement)
- Change all of the variable starred below (they will not be starred in your script):
- Note: Picking micrographs output will change depending on whether you're using "Exposure
Groups" or "Exposure sets"
- For Exposure Groups:
picking_micrographs_output = "exposure_group" - For Exposure Sets:
picking_micrographs_output = "split"
- For Exposure Groups:
# CryoSPARC Master Settings
*cs_host = "mycrosparc.mycampus.edu"           # URL of CryoSPARC Master instance
cs_port = 39000# Port of CryoSPARC Master instance
*cs_email = "myemail@mycampus.edu"# Email address of your CryoSPARC account
*cs_pass = "mypassword"# Password for your CryoSPARC account
*cs_license = "mylicensenumber"# License key for your CryoSPARC instance
# Job Settings - Replace n with number
job_title = "crYOLO Picks"# Title for your job
*cs_project = "Pn"# Project number
*cs_workspace = "Wn"# Workspace number to create jobs in
*training_micrographs = "Jn"# Job number to be used for training
training_micrographs_output = "exposures_rejected"# Which output to use for training
*training_particles = "Jn"# Which particles for training
training_particles_output = "particles_rejected"# Which output to use for training
*picking_micrographs = "Jn"# Job with micrographs to pick
picking_micrographs_output = "exposure_group"- Once you have modified cryolo.py and given it a new name, move it to a project-specific sub-directory within cryolo (e.g. cryolo/P29)
- Copy the batch submission below into your working directory, and name it cryolo.sbatch ,
- Wwap the name of your script in where "cryolo_P29_J398_prespacer_only.py" is currently
#!/bin/bash
#SBATCH --partition gpupriority
#SBATCH --account priority-blakewiedenheft
#SBATCH --nodes=1
#SBATCH --ntasks-per-node=1
#SBATCH --cpus-per-task 16
#SBATCH --gpus-per-task=1
#SBATCH --mem 120000
#SBATCH --time 72:00:00
#SBATCH --job-name cryolo_P29_J398
#SBATCH --array=0-11
#SBATCH --output cryolo-%j.out
#SBATCH --error cryolo-%j.err

module load cryoem/cryolo/1.9.6
python cryolo_P29_J398_prespacer_only.py ${SLURM_ARRAY_TASK_ID}
-
- Note: In this job, I split my micrographs into 12 exposure sets, so I'm using array=0-11 (twelve individual Slurm jobs will be submitted). If you use exposure sets from a 5x5 multishot data collection, this should change to array=0-24
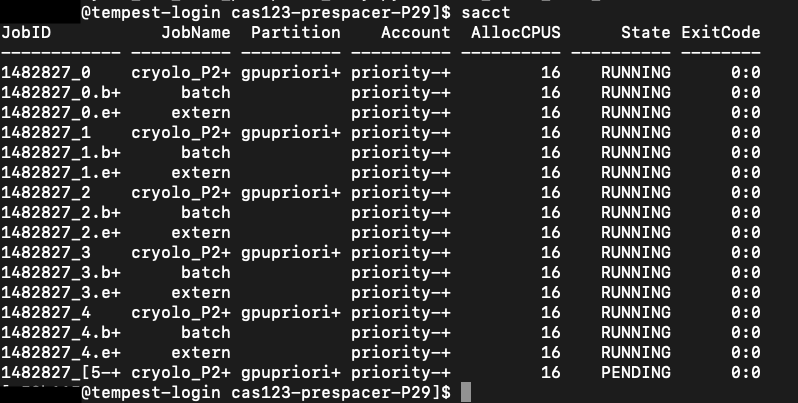
- Check that cryolo is now running on Tempest using sacct
- Check that cryolo jobs are showing up in cryoSPARC
- Note: These jobs will show up as "External" interactive jobs. This means they are still running. Once cryolo has finished and the job appears as completed in cryoSPARC, you can treat the particle stack as any other particle stack.
