cryoSPARC to Relion 5.0
Overview
CryoSPARC and Relion are both useful tools for analyzing cryoEM data. General consensus in the field is that the most powerful analyses use a combination of both. Outlined below is a tutorial for taking a particle stack from cryoSPARC to Relion 5 on Montana State University's HPC cluster, Tempest.
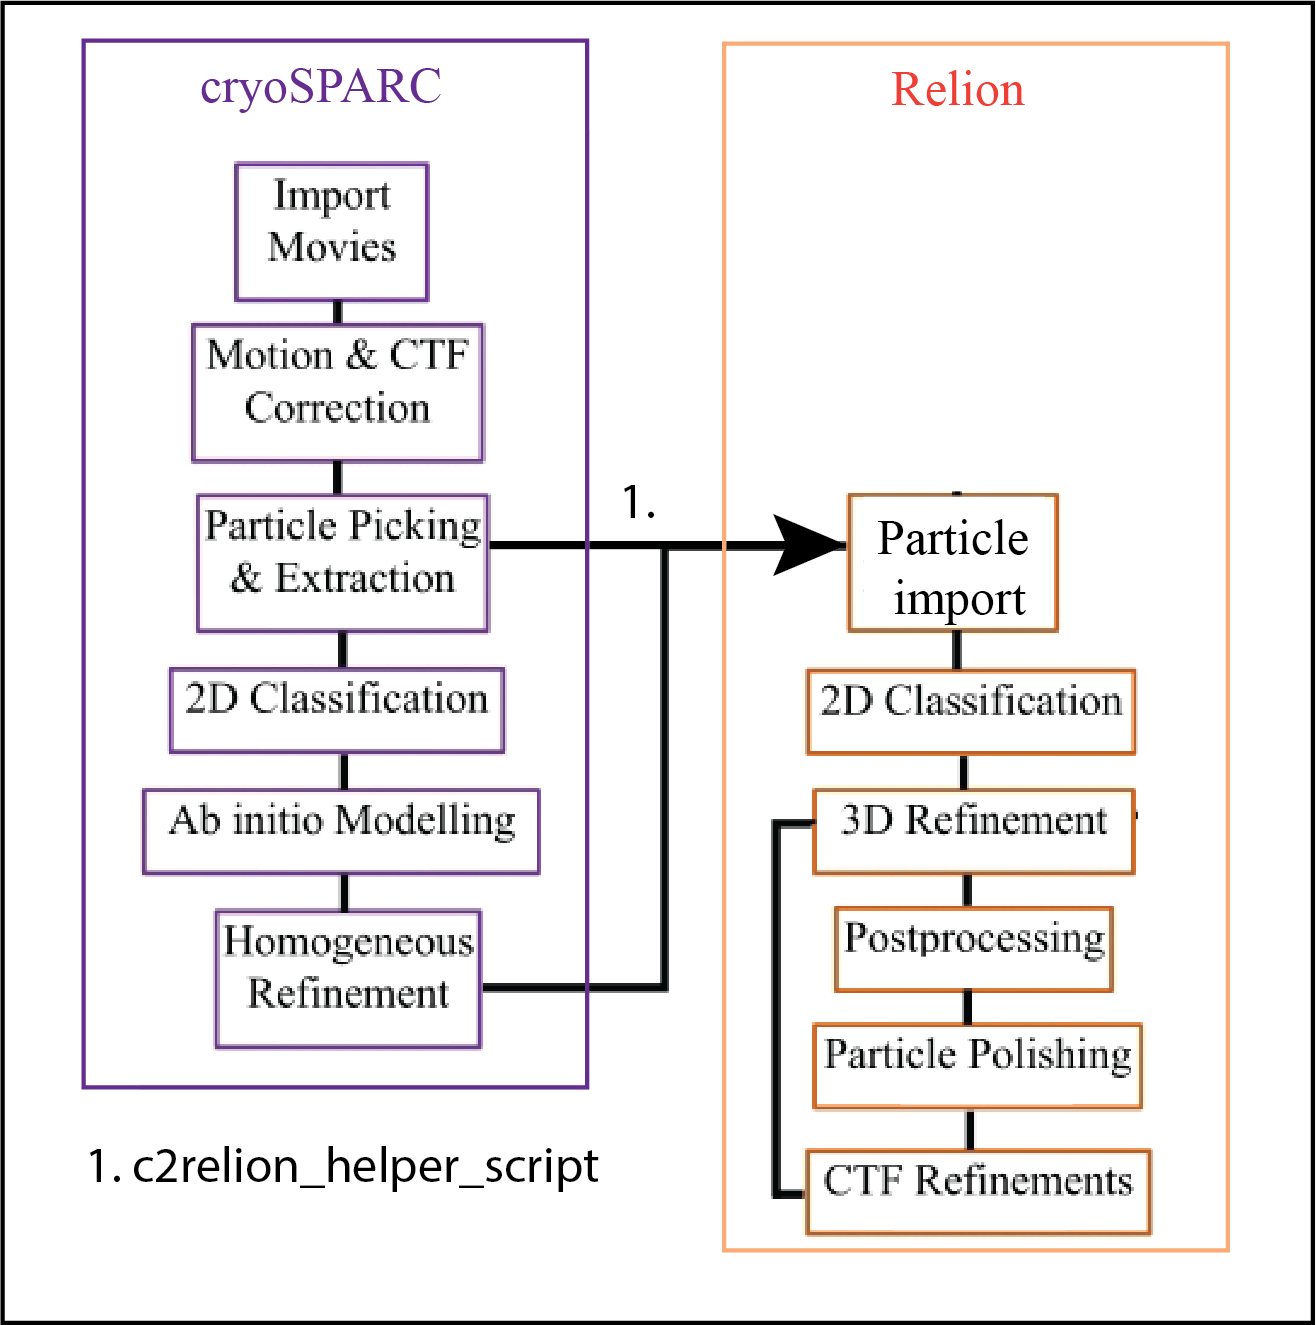
The general flow looks something like this (adapted from DOI: 10.3791/63387) and uses a script (c2relion_helper_script.sh) customized for Tempest (as of 2023-11-13, only available to Wiedenheft lab members).
Getting started
- Command line access to Tempest with X11 forwarding enabled
- Make sure you are using the -X flag when using ssh
-
ssh -X <yournetID>@tempest-login.msu.montana.edu
- You will need the following:
- A relion directory inside of your project directory
- Wiedenheft lab projects are organized so that each project directory has
- Raw data micrographs
- A cryoSPARC directory
- A relion directory
- To check if a Relion directory exists, use the following commands:
-
cd /mnt/blackmore/mcb-wiedenheft/EM-data/<path_to_your_project>
-
ls /mnt/blackmore/mcb-wiedenheft/EM-data/<path_to_your_project>
- Wiedenheft lab projects are organized so that each project directory has
- A relion directory inside of your project directory
-
-
- If a relion directory doesn't exist, use the following commands (replacing <path_to_your_project> with the path to your project directory
-
mkdir /mnt/blackmore/mcb-wiedenheft/EM-data/<path_to_your_project>/relion

cd /mnt/blackmore/mcb-wiedenheft/EM-data/<path_to_your_project>/relion
-
 Your project directory should now look like this (letters indicate directory as outlined
above, box around relion directory).
-
- A homogenous or non-uniform refinement job from cryoSPARC (with corresponding JXXX
job number)
- Take note of the final iteration number:

- A cryoSPARC extraction job that contains your particles of interest.
- If you used a multi-threaded extraction job initially, you will need to re-extract your particles used in the refinement as a single extraction job.
- To reduce memory and cache requirements, we recommend doing this regardless of your initial extraction strategy.
- A homogenous or non-uniform refinement job from cryoSPARC (with corresponding JXXX
job number)
Running c2relion_helper_script
- Once you have completed the above steps, you are ready to import your particles into Relion.
- Load the relion module using the following command:
-
module load cryoem/relion/5.0
-
- Add the location of the c2relion_helper_script to your PATH variable
-
export PATH=$PATH:/home/group/blakewiedenheft/software/bin
-
- Run the c2relion_helper_script and follow the prompts in the terminal.
-
c2relion_helper_script.sh
- Note: do not include the trailing slash in your relion and cryosparc paths!
- Note when using projects from old cryoSPARC versions imported into updated cryoSPARC: You may get a "File Not Found Error" when converting the particles.cs to particles.star.
In case you get this error, navigate into the appropriate job directory and copy the
particles.cs and particles_passthrough.cs files to new versions that have the appropriate
prefix.
- For example, P5 J402 was a Refinement conducted in cryoSPARC 3. The prefixes are:
- cryosparc_P5_J402_007_particles.cs
- P5_J402_passthrough_particles.cs
- These need to be copied, and the copies should be renamed to:
- J402_007_particles.cs
- J402_passthrough_particles.cs
- For example, P5 J402 was a Refinement conducted in cryoSPARC 3. The prefixes are:
-
- This script will create a user-specific relion project directory. Follow the prompts
from the script, and cd into that directory.
- It is CRITICAL that you cd into this directory before launching relion to avoid conflicting analyses between users - Relion is NOT as user friendly as cryoSPARC.
Launching Relion
- From your user-specific relion project directory, launch relion with:
-
relion &
-
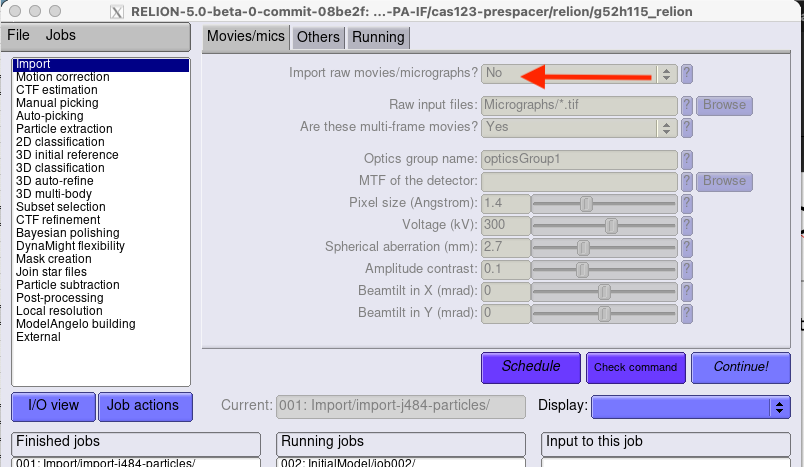
- You will now need to import your particle stack into Relion using the Import job.
- In the Movies/mics tab, set "Import raw movies/micrographs" to "No"
-
-
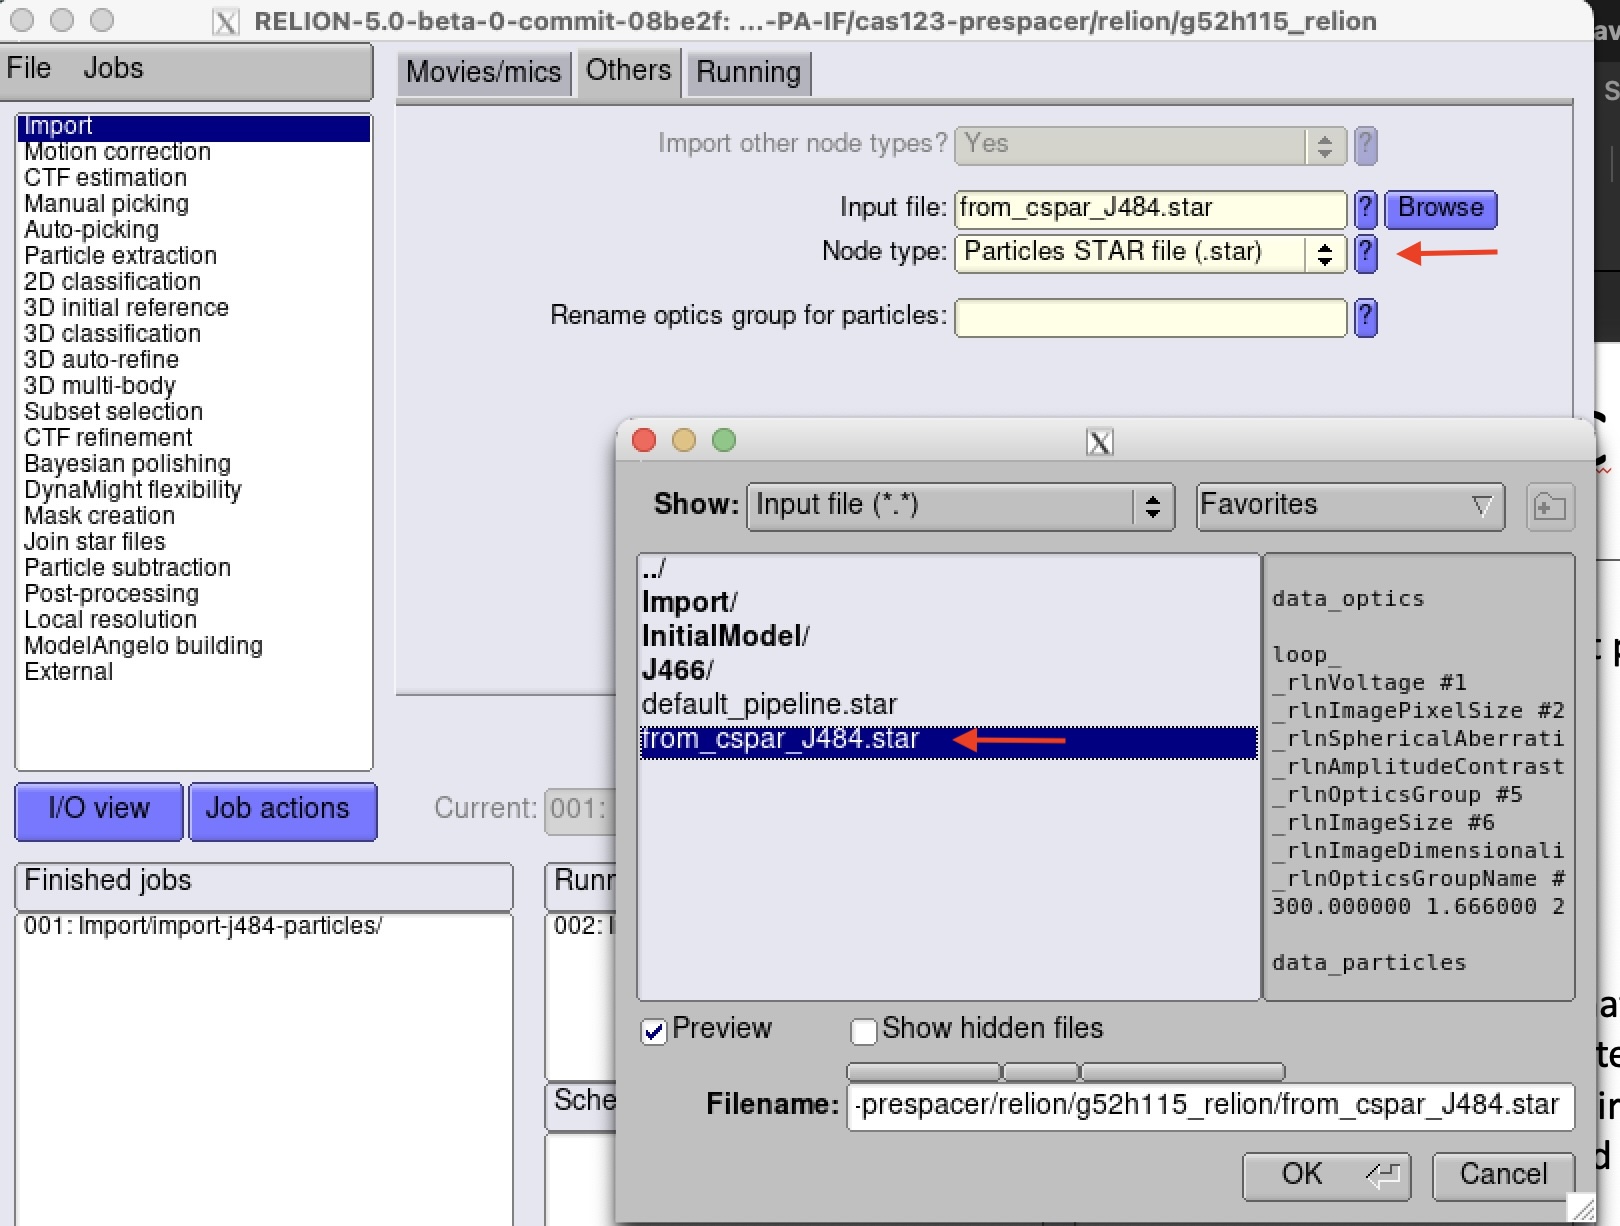
- In the Others tab, set your input file to the .star file in your user-specific relion project directory. Set Node type to "Particles STAR file (.star)".
-
- Click the "Run" button (don't worry about anything on the "Running tab")
3D Classification in Relion
Builld initial models in Relion
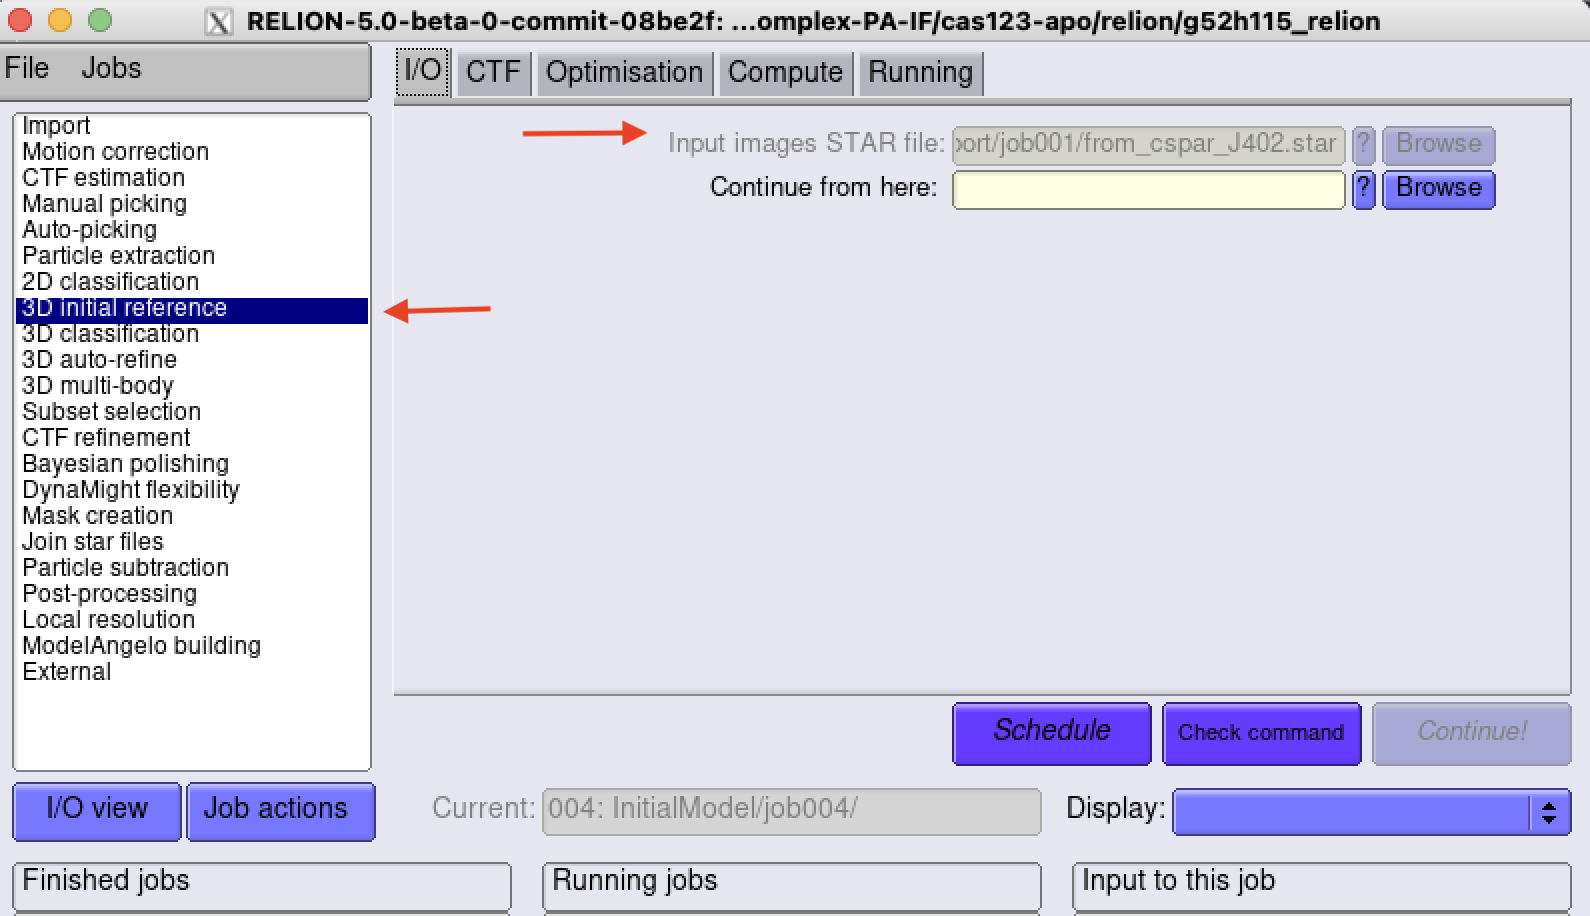
- In the "Input" tab, set your particle.star file to the imported .star file (Import/jobXXX/<particles_file_name.star>)
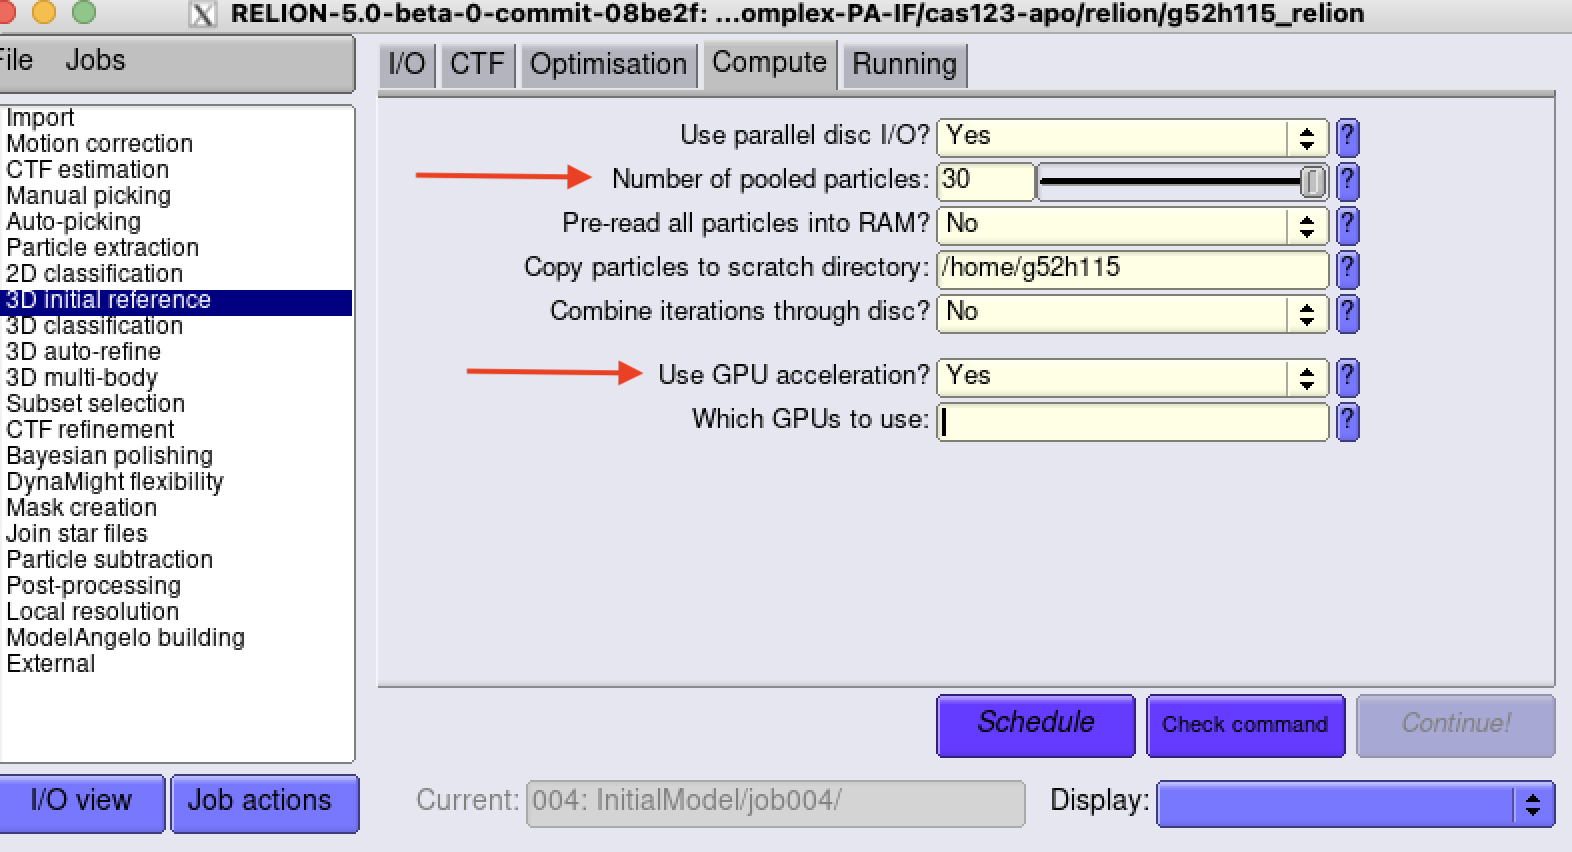
- In the "Compute" tab, change the followig fields:
- Number of pooled particles: 30
- Use GPU acceleration? Yes
- Defaults are fine for the rest.
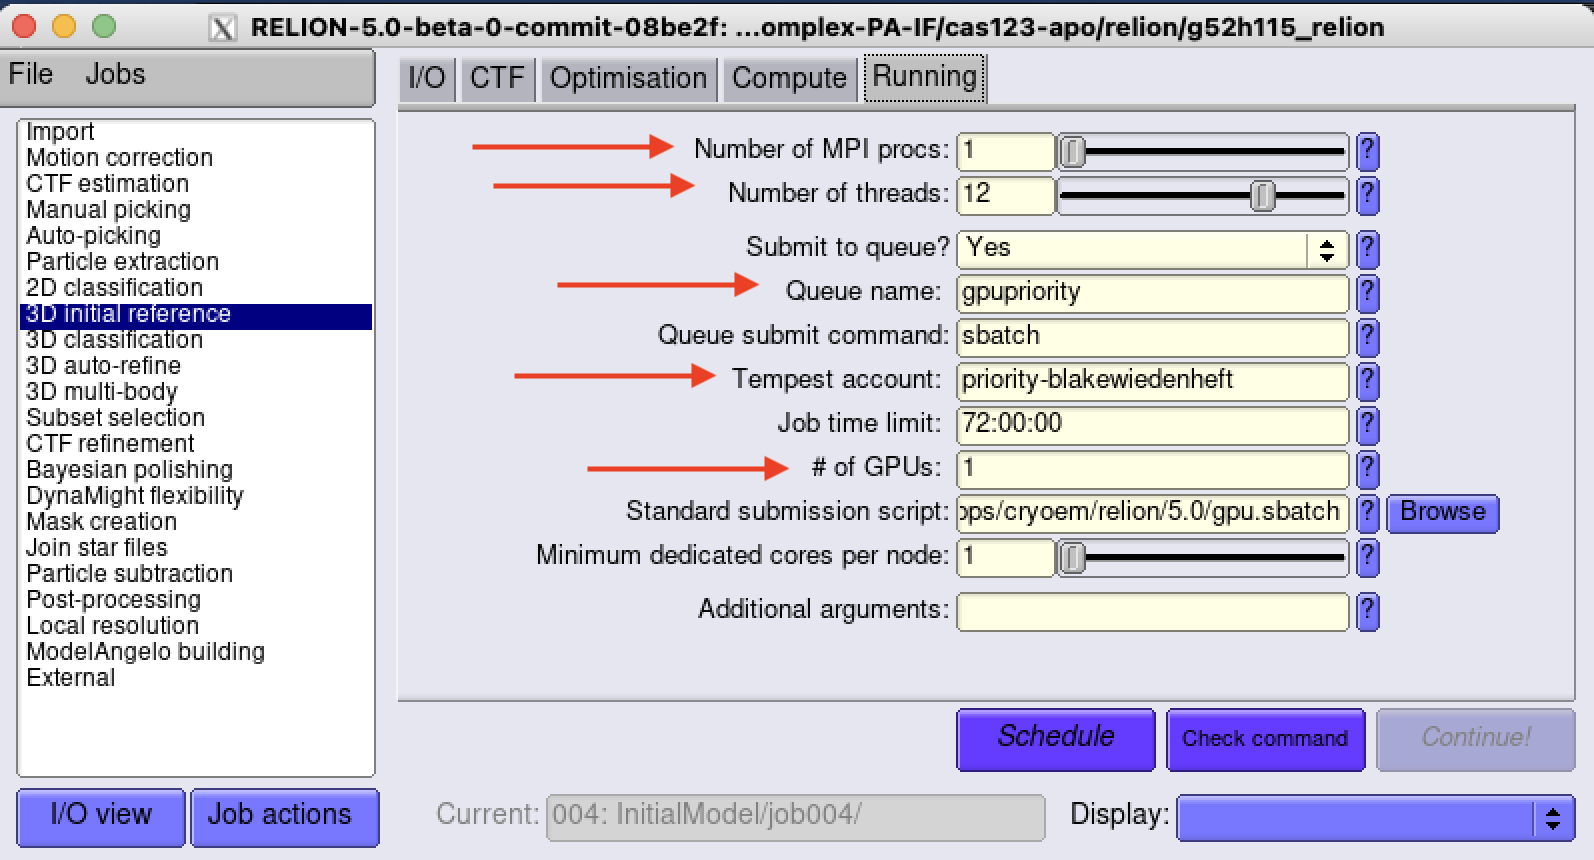
- In the "Running" tab, change the following fields:
- Number of MPI procs: 1
- Number of threads :12
- Queue name: gpuunsafe (generally) or gpupriority (rarely)
- Tempest account: group-blakewiedenheft (generally) or priority-blakewiedenheft (rarely)
- # of GPUs: 1
- Defaults are fine for the rest.
3D classification
3D classification is a powerful for sorting out particle heterogeneity once you have a relatively clean particle stack.
- Several papers that demonstrate the power of 3D classification:

