Relion
Relion 3.1.3
To familiarize yourself with Relion, you should work through the Relion 3.1.3 tutorial.
Below are screenshots and instructions you won't find in the tutorial that are specific to running Relion on Tempest in the Wiedenheft lab.
Requirements
- Command line access to Tempest with X11 forwarding enabled
- Make sure you are using the -X flag when using ssh
-
ssh -X <yournetID>@tempest-login.msu.montana.edu
- The Relion tutorial dataset
- Accessible at: /mnt/blackmore/mcb-wiedenheft/EM-data/relion-tutorial/relion30_tutorial
- A project directory in /mnt/blackmore/mcb-wiedenheft/EM-data/relion-tutorial
- Use the following commands, replacing <your_netID> with your netID
-
mkdir /mnt/blackmore/mcb-wiedenheft/EM-data/relion-tutorial/<your_netid>_tutorial

cd /mnt/blackmore/mcb-wiedenheft/EM-data/relion-tutorial/<your_netid>_tutorial
- A link between the tutorial dataset and your project directory
- Note: Never use the rm -r flag with symbolic links. You must first destroy the symbolic link using the unlink command. Reach out if you have any quetions.
-
ln -s /mnt/blackmore/mcb-wiedenheft/EM-data/relion-tutorial/relion30_tutorial/Movies Movies
- An MTF file for the Talos Arctica
- This can be found at: /mnt/blackmore/mcb-wiedenheft/EM-data/relion-tutorial/mtf_k2_200kV.star
Loading the Relion 3.1.3 module
- Note: as of 2023-10-30, the following sequence must be used for Relion to be functioning
-
module load cryoem/relion/5.0

module unload cryoem/relion/5.0

module unload UCX

module load cryoem/relion/3.1.3
-
You should see the following:

Running Relion
Run the following command from your project directory
relion &
You should see a pop up that tells you that this does not look like a project directory, and ask you if you want to continue. Click "Yes".
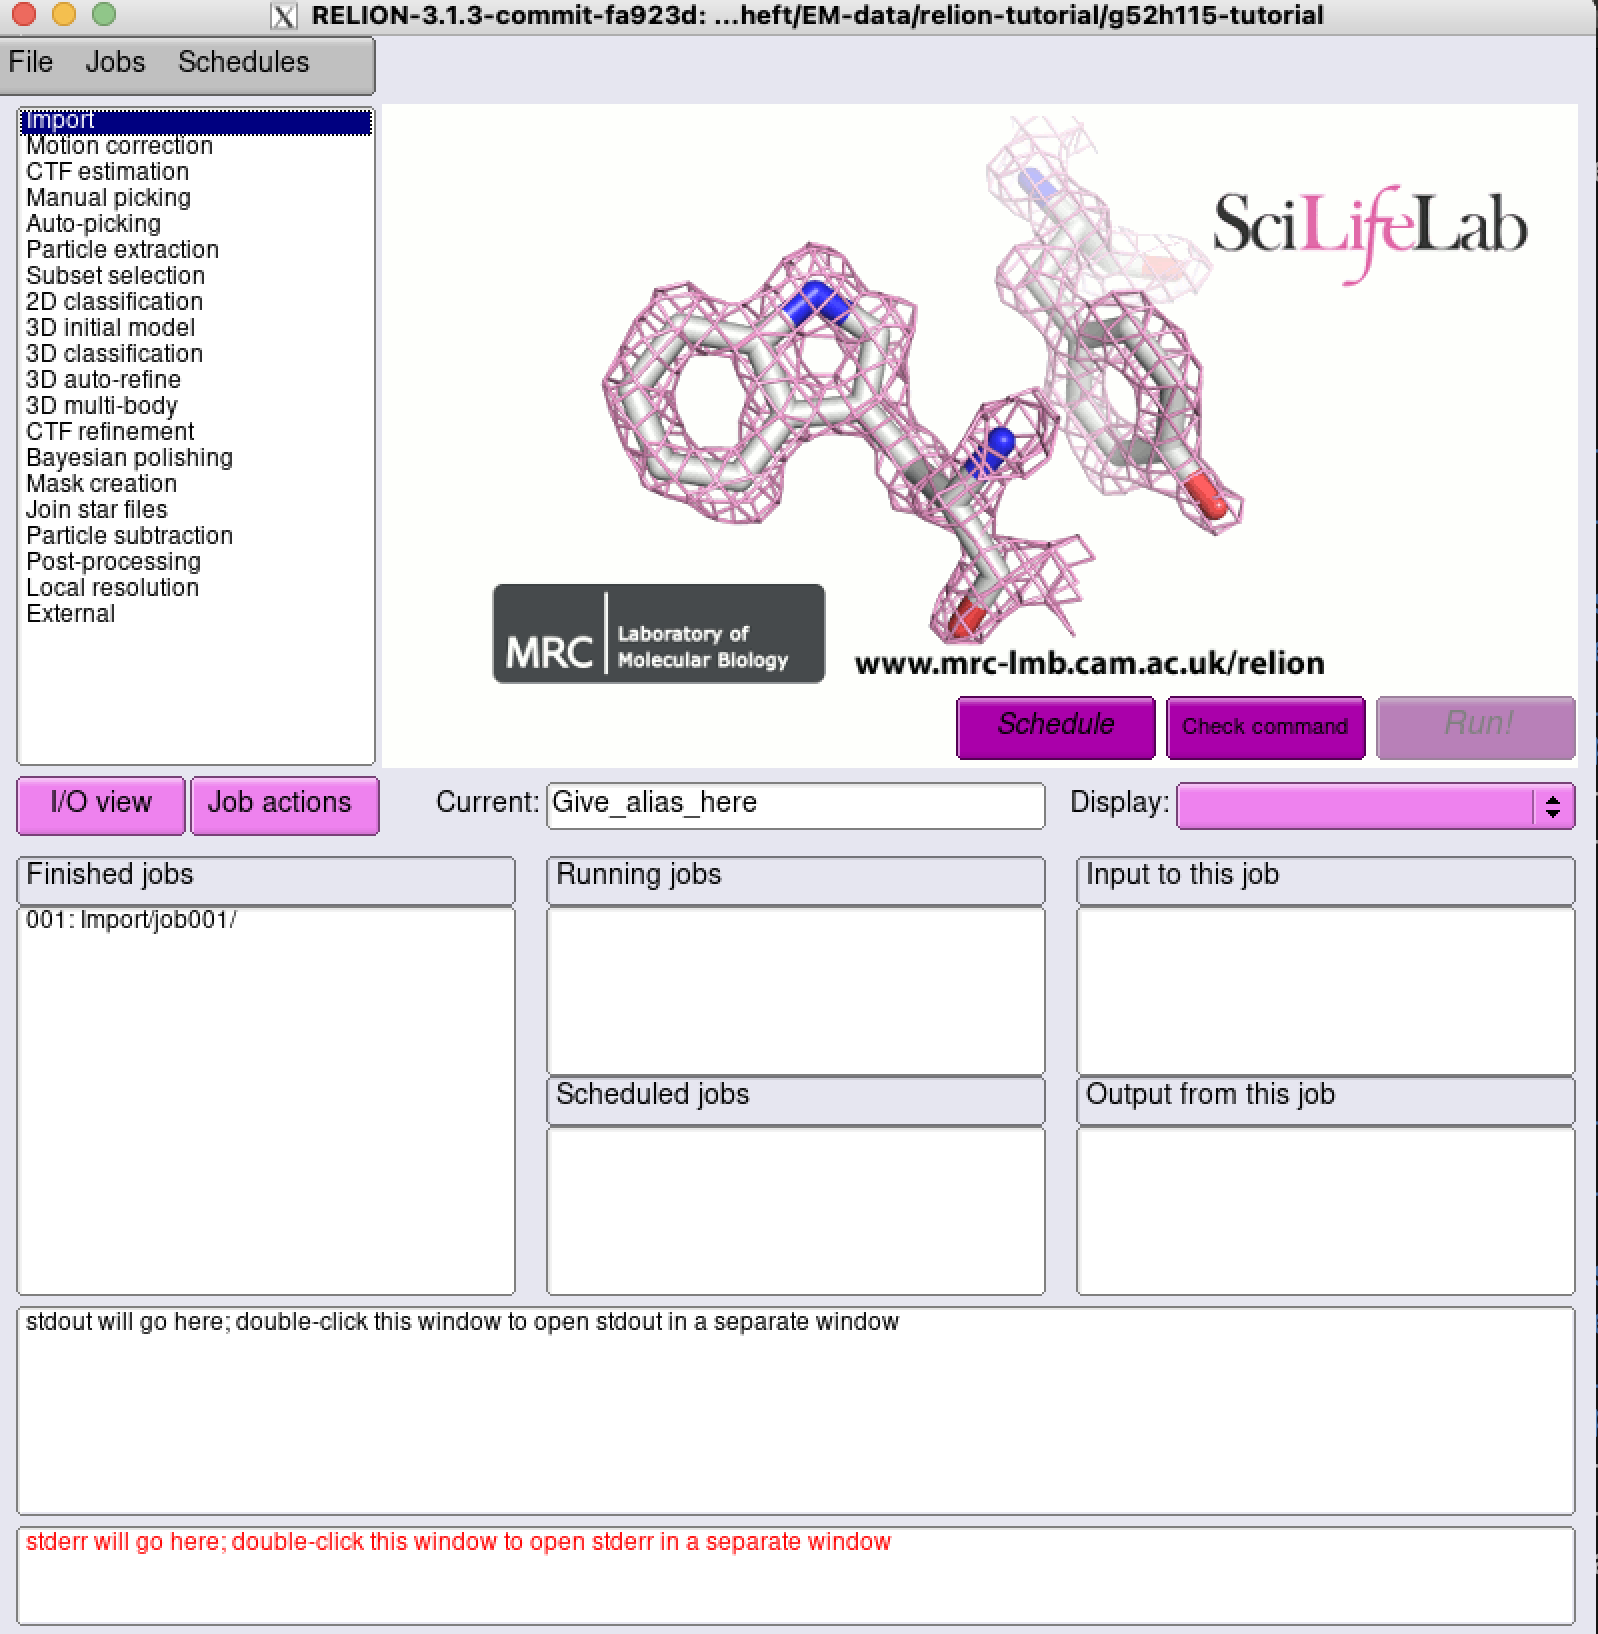
You should see the following screen open in your X11 forwarding app (on Mac: X11 Quartz)
To select a specific job type, click on a job in the menu on the left - in the below image, "Import" is selected.

Importing micrographs
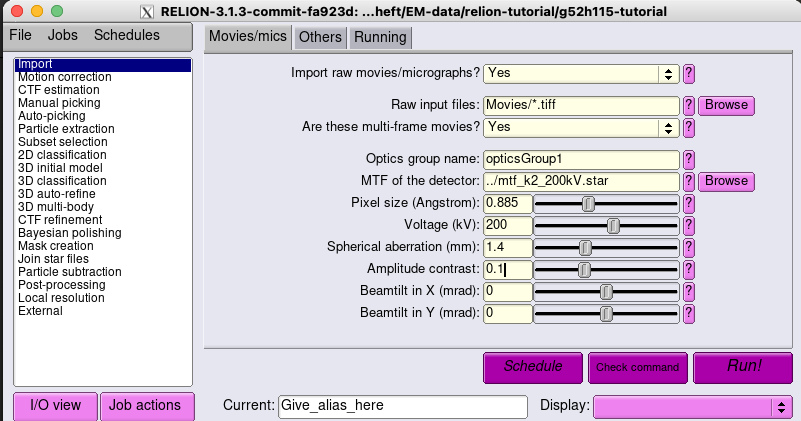
- Select the "Import" job
- Fill in the "Movies/mics" tab as below
- Click "Run!"

- Verify that your session is working as expected with a quick ls in your project directory
- You should have two new items in your project directory:
- A default_pipeline.star file
- An "Import" directory

Slurm settings

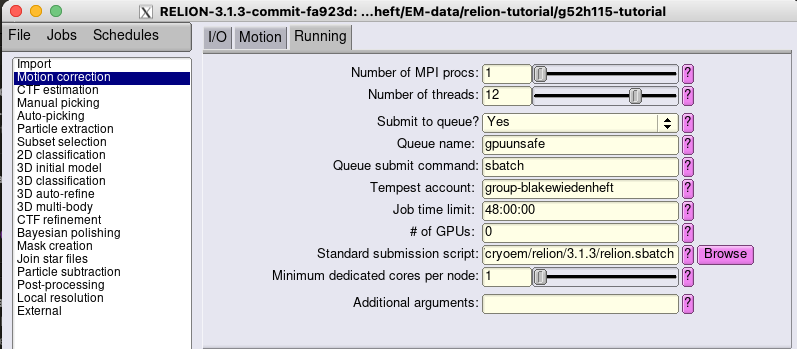
Make sure that you are using the following settings:
- Queue name: gpuunsafe
- Tempest account: group-blakewiedenheft
At this point, you should be good to work through the rest of the Relion tutorial.
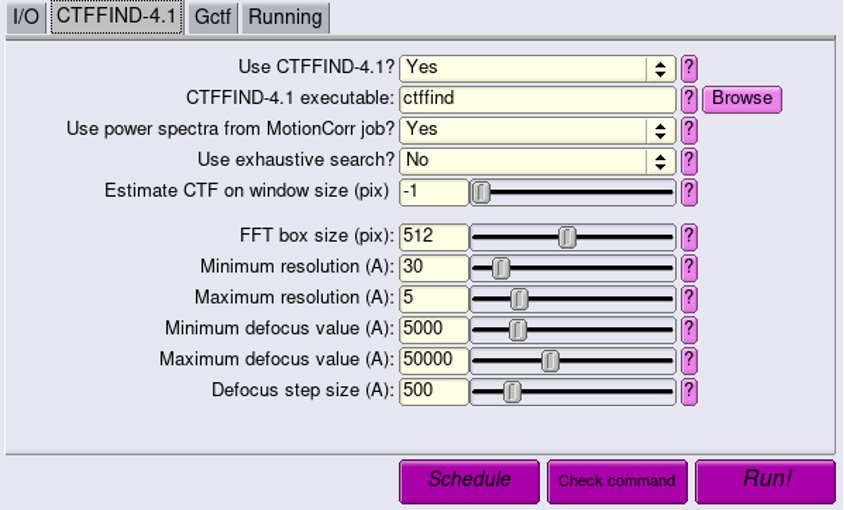
Note: CTF correction should be performed with CTFFIND-4.1. Set this tab as in the below PNG:
- Use CTFFIND-4.1?: Yes
- CTFFIND-4.1 executable: ctffind

Downloading and uploading volumes to Blackmore
This section is under development.
